Tuesday, December 28, 2010

Giveaway x2

When it comes to Blog giveaways
I enjoy the post and watch with envy as one lucky reader
walks away with an amazing prize
I'm not very lucky, so I never really enter
Until now.........
Have you seen these?!?!
The Silhoette!

Words cannot express how bad I want this!

Its a little funny actually,
for Christmas this year my hubby got me something I have been wanting
for some time now...
The Cricut!

We took it back today in hopes that I could possibly win this!
But if not I plan on buying it

But if you want to win one head on over to House of Smiths

Monday, December 20, 2010

Hot Chocolate Cupcake

This time of year is the worse for food,
don't you think?

Who really wants candies, cookies, cupcakes, muffins, turkey, etc.
I Do!!!!

I love it
I can't get enough which means come December 27, I will be at the gym

I love eating and creating cupcakes so here goes my 1st cupcake tutorial

Hot Chocolate Cupcakes

Not sure what others thought about them but I sure did love 'em

I also did a few cupcakes in a jar for the kids


1.  Prepare your cake for the cupcakes

2. While the cupcakes are cooking, prepare your ganache
Some people are scared of ganache because they think it can me difficult
It is in fact the easiest sweet to make
Bring about 1 c. of Heavy cream to a boil
Once the cream is at a boil, pour over 1 bag of semi-sweet chocolate chips
Using a wisk, mix together
It's that easy


3. While the cupcakes are cooling prepare your icing
You can use any icing you would like
My go to icing is a simple Butter Cream


Cream 1 c. of softened butter with 1 c. of Shortening (Crisco)
Add a dash of salt
Add 1 tsp. of vanilla
Scrape the sides of your bowl to make sure everything is mixed
Add 4-5 c. of Powdered Sugar
Use your eye on this you want it thick
Once it is completely mixed, you will add about 1/2 c. of cold whipping cream
Whip at the highest speed for about 1 minute
You will see a very fluffy Butter Cream....YUM!


4. Once your cupcakes are cooled, scoop out a tiny hold in each cupcake, fill each hold with ganache


5. Now you are ready to ice your cupcakes
I like to use a gallon size Ziploc bag
Fill the bag with icing and clip the corner


6. Add a little drop of ganache to the top of the cupcake


For the Jars I just alternated the ingredients with a few marshmallows
I use cupcake liners for toppers


This Christmas I am asking for followers!!!
Please help me!


Thursday, December 16, 2010

Handmade Gifts (Part 3)

We are now in the final Day of out 3 part series
You have to get started on your gifts!
We are 1 week away!

This is another easy one
I know there are so many versions on Blogland so I wanted to share mine

You want to start with a nice frame
This particular one come from Michaels
at 50% off with an additional 25% coupon makes the final price $3.45---SCORE!

Grab your chalkboard paint
A lot of people prefer the spray paint form
I like this particular kind from AC Moore
It comes in a ton of colors, you'll see that soon


I then take the glass out and use it as a template to measure the foam board

Paint your foam board
Pop it back into the frame (without glass of course)

And there you have it!


I used Command Strips to hang it from my Refrigerator
I love how it looks on my Fridge, I hope the recipient does too!


Tickled!!!!!

I interrupt this 3 part series to bring you some exciting news!!
I have been featured on one of my favorite blogs!
I discovered Kristen's Blog, Ladybug Blessings a few months ago
When she commented on my Art Kit that I should link up to her party, I was a little nervous

Can you believe she featured me?!?!

Go over there a check it out
You will love her and your blog


Wednesday, December 15, 2010

Handmade Gifts (Part 2)

Yesterday I showed you Art Kits that I made for the big kids
Today in the 2nd edition of Handmade Gifts I'll show you what I made for the 
little ones

Voila!


I got the idea from Amy at Naptime Crafters
She is a much better sewer that I am so I had to modify just a tad
I think they will love them!

Tuesday, December 14, 2010

Handmade Gifts (Part 1)

With Christmas just a mere week and a half away all of our 
Christmas shopping should be complete, right?

Well if most of you are like me you always leave a few to the last minute

This year I decided to save money (not time) 
by creating my own gifts

Lucy now has 8 cousins and 1 on the way so I needed something sure to please them all

For the 5 older kids I made these Art Kits


I first started with some scrap fabric
and made a mini version of the crayon roll
I have never made a crayon roll or even attempted to be honest
Its seems way above my sill level

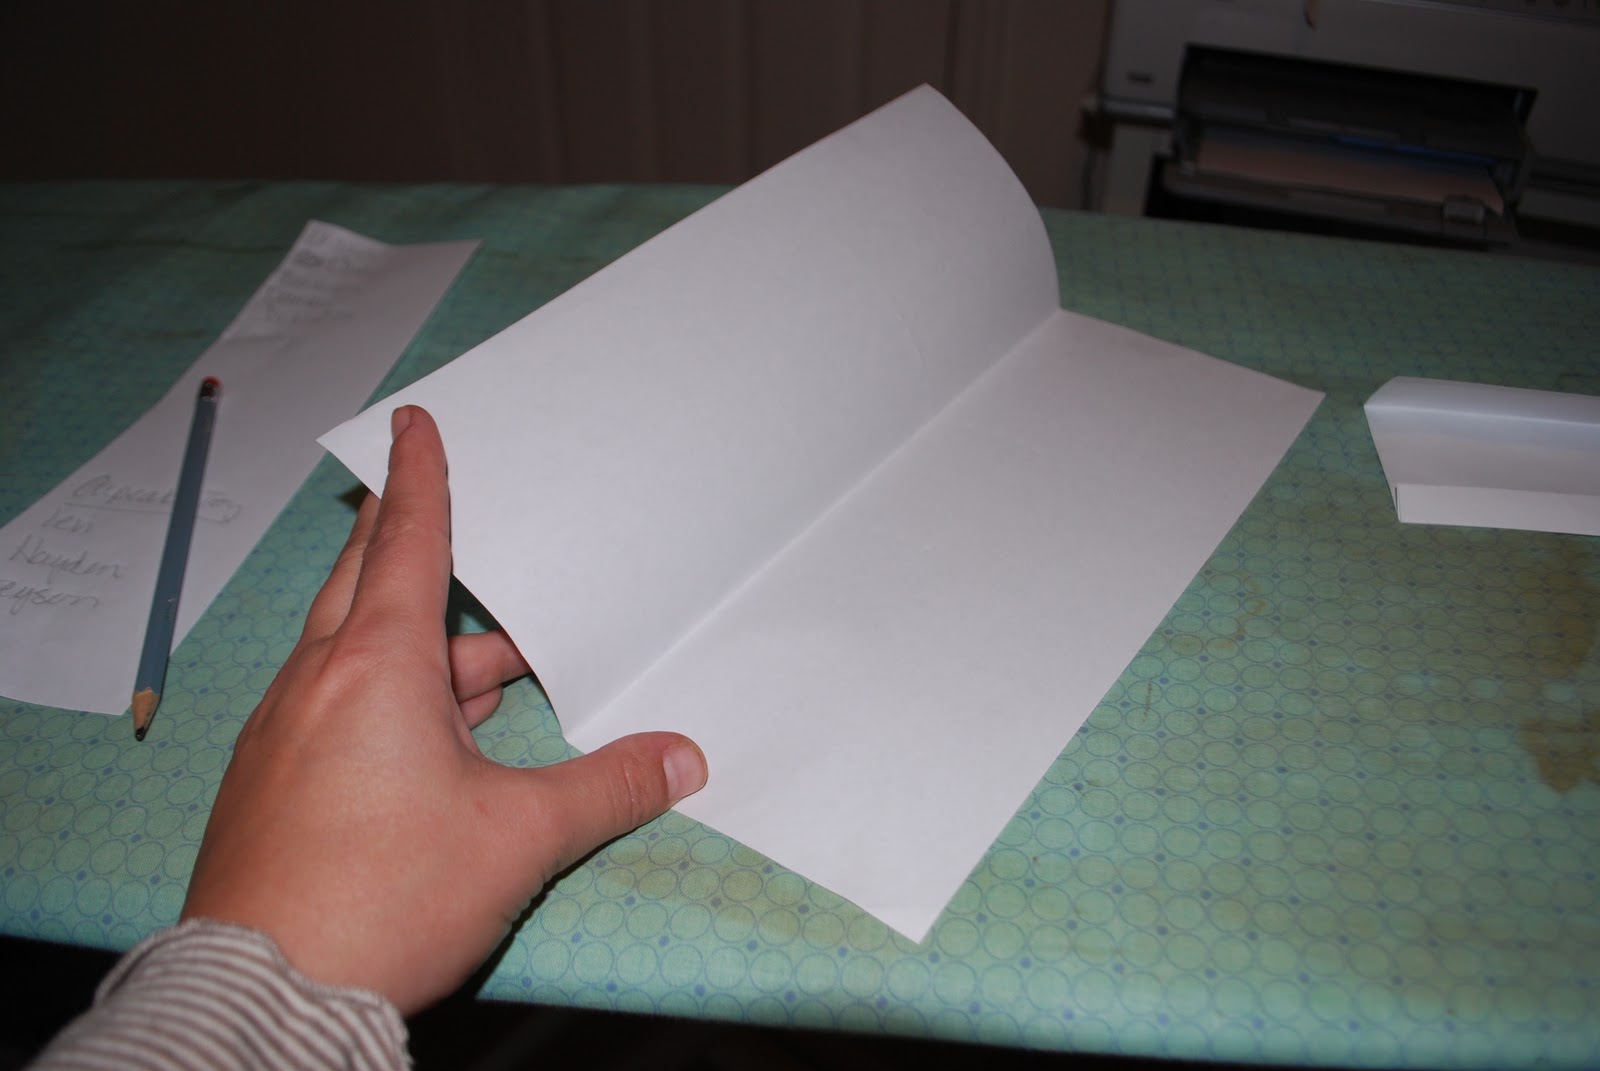
I started by making a pattern out of paper

I first folded 2 pieces of paper in 1/2

I put the first to the side
The 2nd one was cut in 1/2 to a measurement of 5 1/2 inches
You can see where I folded the paper as if I were hemming it


I took the 2nd piece and slid it into the opening of the folded piece

Once I had the idea in my head, I was able to cut my fabric with the pattern
I sewed the first piece as if it were a pillow leaving one of the longer sides open
Folded it back to the right side

I then took the 2nd piece and slid it into the opening


 I then folded it leaving about 1 inch in the "pocket"
By leaving about 1 inch inside, it gave about 3 inches on the outside for the real pockets

I stitched around the entire square, then I made vertical lines to make the slots

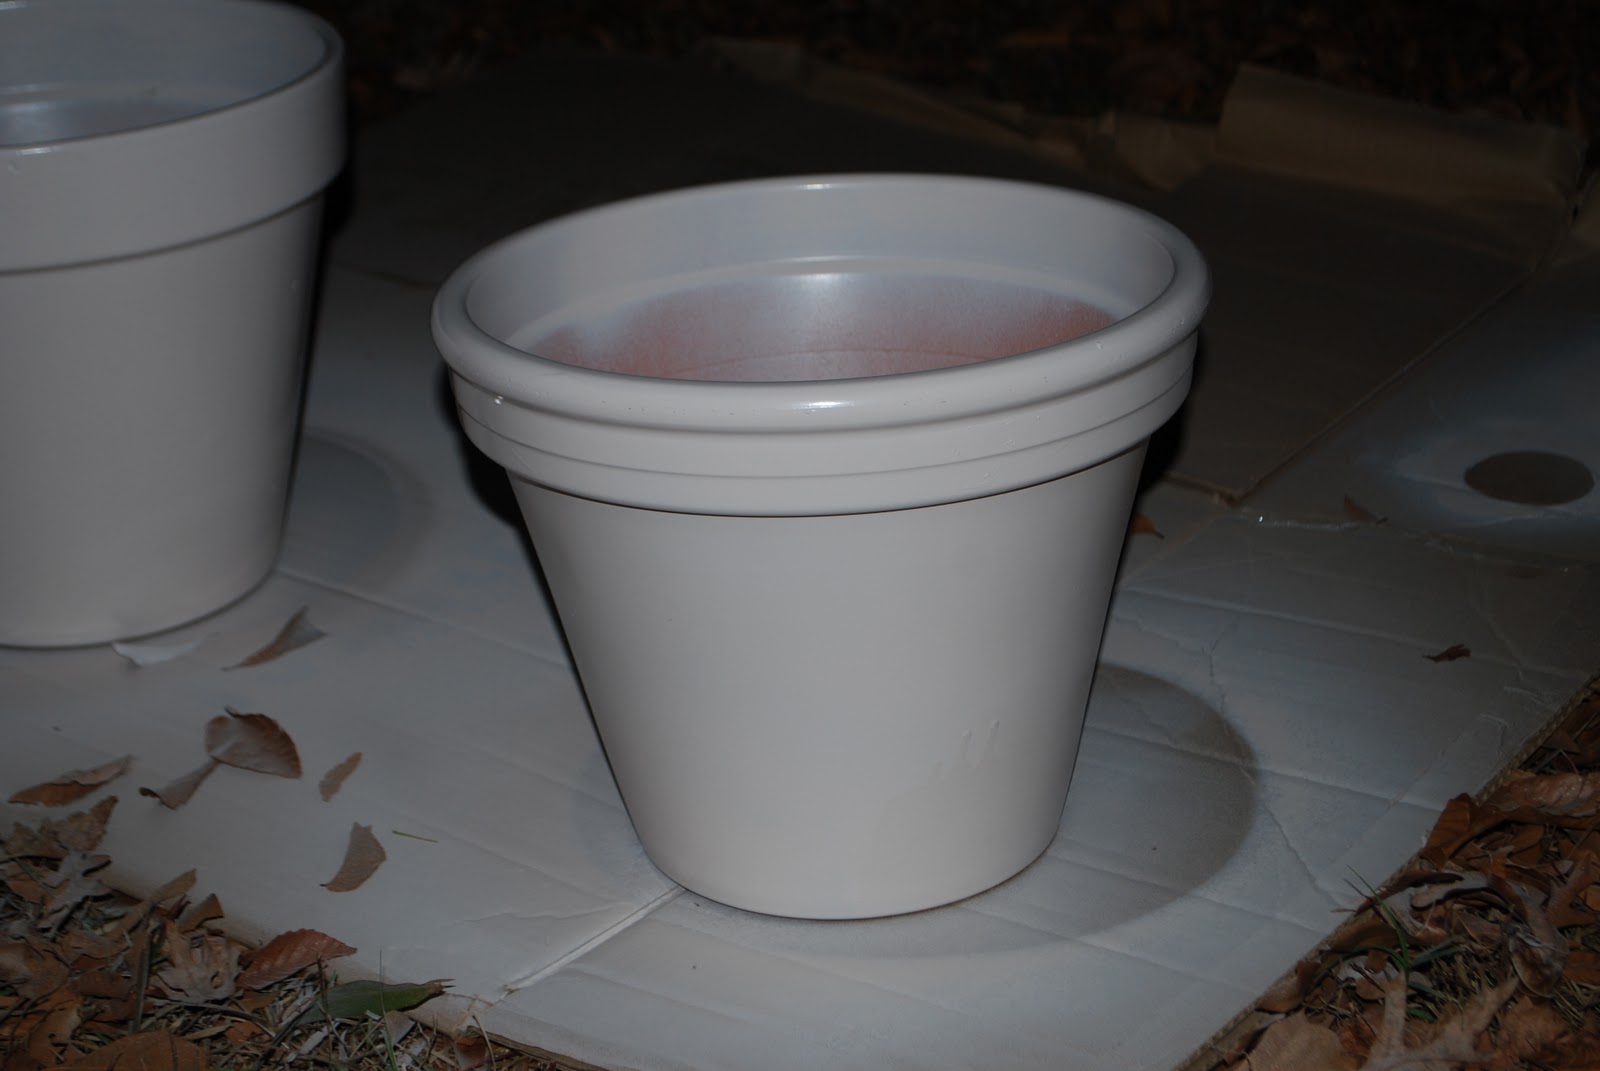
With a little velcro, I attached it to the inside of the bucket

I also used a little Chalkboard paint on the outside to write their names

I put scissors, a few crayons, paint, paper, stickers, chalk and glue

Lucy made some candy and will put that in there too.

Then entire project cost $18 for 6 kits!!!!

I'll be linking to 


www.simplysweethome.com.png

978446896_kPVcp-O.png

Wednesday, December 8, 2010

Traditions

With Christmas rapidly approaching, I wonder if I will get in all my traditions?
The Christmas Tree, the baking, the wrapping, parades, festivals, etc.

Since we moved 2 months ago (feels like 2 weeks), we are still all over the place
I've learned in the last month that the tradition on a real tree is wonderful and pure bliss,
but it is not necessary to have a wonderful Christmas.

Cookies don't have to be made, I can buy them.
All decorations don't have to be out
I don't have to use a Snowman Dish towel to dry my dishes
I don't have to come home to lights draped on the front steps
I don't have to have a fireplace for stockings
I don't have to have Christmas glasses for wine
I don't have to have poinsettias that will die
Don't have to have perfect pictures with Santa to remember the holiday
I could go on, but you get the point

This Christmas I am learning that tradition is nothing more than a word
I plan to continue/reinstate some "traditions" in the future
but the only thing I need to make my Christmas Season perfect is my family

I challenge us all to take a step back, breathe, simplify, and take in the Season


Monday, December 6, 2010

Last but not least...

I guess I should have made this a 3 part series
But I am not clever enough for that
So lets pretend I did...

If this was a series, this would be the last installment
I know I showed you how much I love these
Since hubby said "no"
I couldn't resist buying leopard print ribbon
It was love at first sight
Can you believe Michael's had this?

A little bow later and I had this.....

My Inspiration

My Version

Its not snowing in Charleston.
But I like the effect


Sunday, December 5, 2010

From Napkins to Pillows

When browsing Pottery Barns Christmas Catalog 
I couldn't get enough of this plaid print
1. I love Plaid
2. Christmas plaid is even better
3. It already matches my Green Sofa and red accent chair

Of course I had to have it!!!!
I went to my local Pottery barn and they only had the green version
Still very cute, but I wanted red
They did however have it in the bigger size but I really had my heart set on 24x24

Since I was heading back home for Thanksgiving
I thought I would try the local PB there
Well, I got the truth about my beautiful plaid pillow....

They were not for sale....EVER!
Can you believe that?
PB decided to not produce the 24x24 pillow cover featured in the catalog
They did however produce Napkins and place mats instead
At least thats what Ms. PB told me

So I bought 4 napkins at $6.50 a piece and thought
"Project Time"

I usually use place mats, they are less expensive and easier but again-
I wanted 24x24


The first thing I did was sew the 2 together
Because of the plaid I wasn't to stressed about it being perfect

Then I flipped it over and connect the 2 ends
Only pin the sides
You want the envelope opening

Sew the sides

And Voila!


The price for one PB pillow cover
If they even existed
$29.00


They cost for mine
$13.00


Saturday, December 4, 2010

Updated Entryway Trees

I know I gave a little tease on the last post about what I have been up to
Meet entryway trees
I love these trees
They are always beautiful
But as you can see, they need a little updating

Here is the front door that I absolutely love

A little bit of this

And that.....
Gives me this

I love this Muslin color
Its a beautiful winter white that makes me smile
It was beautiful like this, but I wanted to be inspired by Ballard,
Not copy them
Even though I totally would!

So.................
I added this:
And got this...

So here you have it
New and improved Trees

Friday, December 3, 2010

I am head over heels
Can't sleep
Can't eat
Butterflies in my tummy
In love with Ballard Designs Christmas catalog!
Do you know how bad I want these stockings?!?!
Hubby said no (insert really sad face here)

Isn't this entryway stunning?
I love everything about it
The simplicity and beauty of Christmas is all over this front door.
I think if I saw this, I would walk right in
I bet the owner would offer me a drink and a truffle or two

I already had a set of entryway trees like the ones pictured
But they were in the need of a little sprucing up.

I went to Michael's and grabbed some terra cotta planters and spray paint
Went home and got started-

Stay tuned! Its my favorite project yet!!!

Thursday, December 2, 2010

You melt my heart

Every year since Lucy was born, we make "handmade" ornaments
You know the kind, the hand print hanging on the tree.
They are still my favorite, so we will probably still do them

But- for now, I decided to make it more fun for Lucy
While browsing Michael's earlier today we saw ball ornaments

They were plastic!!! Have I been living under a rock?!?!
I thought they were all made out of glass!!!!

We decided on the melted snowman 
Here is what you need:
glue
Ornament balls
glitter
some felt
sticks (from the yard)
paper
tooth pick ( I used mini skewers I had laying around)

And if you are lucky enough to have one of these.....
I had Lucy squeeze the glue into the hole,
shake around the glitter until you have a blob
Use your toothpick to arrange the hat, scarf, buttons, and nose etc.
I used felt because I like the way it made it look a little more real
Because melted snowman in a globe are so common and real, right?

She had a blast, however the attention span of a soon to be 3 year old is short
We only completed 2 of the 4
There is always tomorrow!

I still need to had the "you melt my heart" tag
Just not sure what I want yet
What do you think?


cg-holiday-button1.jpg

Wednesday, December 1, 2010

Stop the insanity......

For the love of all blog  stalkers  followers everywhere....


imgres.jpg

Please Stop!
I love a good Carry On print just as much as the next gal,
but can you imagine how that persons house looks with nothing but these printables?!?!?!?!

I love them, I really do!
I just need another obsession right now.
What about you?